▽Original Thread
http://forum.xda-developers.com/galaxy-s2/themes-apps/mod-t2744332
Thanks to:"Vivek_Neel"
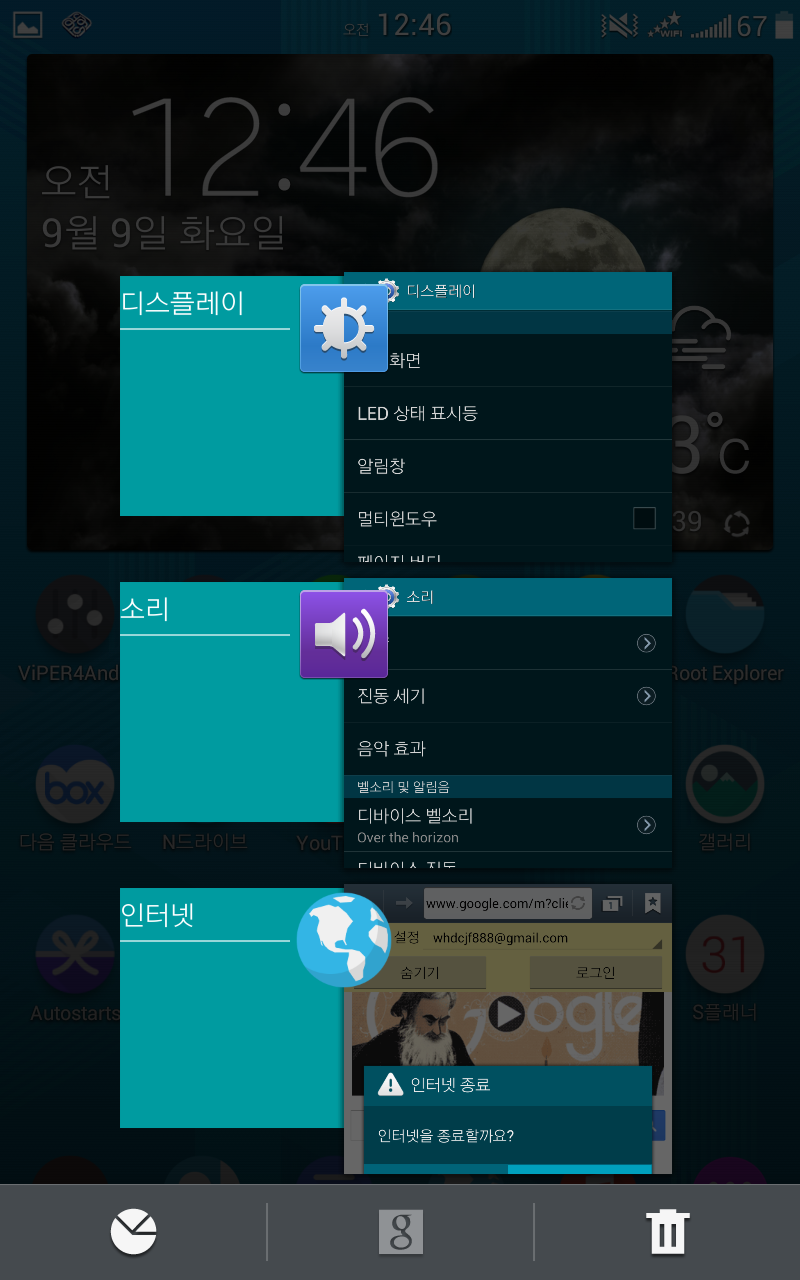
》갤럭시S5스타일의 "리센트 패널" 꾸미는 방법입니다.
》작업에 필요한 파일은 SystemUI.apk입니다.
》디컴파일/컴파일이 가능한 분들에게 해당됩니다.
〉STEP1:
Decompile your SystemUI.apk
〉STEP2:
Navigate to res/layout/system_bar_recent_item and open it with notepad++
#SystemUI.apk/res/layout/system_bar_recent_item.xml 을 열어 작업합니다.
〉STEP3:
#아래 구문을 먼저 찾으세요.(처음 도입부에 있습니다.)
xmlns:android="http://schemas.android.com/apk/res/android">
And paste the below code
#위 구문 바로 밑에 아래 구문들을 추가하세요.
         <FrameLayout android:gravity="center" android:id="@id/recents_item_background_shadow" android:background="#ff005764" android:layout_width="wrap_content" android:layout_height="wrap_content" android:layout_marginTop="6.0dip" android:foreground="@drawable/tw_recents_app_bg">

        <ImageView android:layout_gravity="center" android:id="@id/recents_item_background" android:layout_width="@dimen/tw_status_bar_recents_panel_bg_width" android:layout_height="@dimen/tw_status_bar_recents_panel_bg_height" />

    </FrameLayout>
〉STEP 4:
Navigate to res/layout-land/status_bar_recent_item and open it with notepad++
#이번엔 res/layout-land폴더에 있는 status_bar_recent_item.xml 작업입니다.(헷갈리지 마세요~^^)
Find:
#아래 구문을 찾아서...
android:id="@id/recent_item"
And place the below code after that
#찾은 구문 바로 밑에 아래 구문들을 추가하세요.
 <FrameLayout android:gravity="center" android:id="@id/recents_item_background_shadow" android:background="#ff005764" android:layout_width="wrap_content" android:layout_height="wrap_content" android:layout_marginTop="6.0dip" android:foreground="@drawable/tw_recents_app_bg">

            <ImageView android:layout_gravity="center" android:id="@id/recents_item_background" android:layout_width="@dimen/tw_status_bar_recents_panel_bg_width" android:layout_height="@dimen/tw_status_bar_recents_panel_bg_height" />

        </FrameLayout>
〉STEP5:
Navigate to res/layout-port/status_bar_recent_item and open it with notepad++
#이번엔, layout-port폴더에 있는 status_bar_recent_item.xml 입니다.
Find:
#마찬가지로 아래 구문을 찾아서...
android:id="@id/recent_item"
And place the below code after that
#찾은 구문 바로 밑에 아래 구문들을 추가하세요.
             <FrameLayout android:gravity="center" android:id="@id/recents_item_background_shadow" android:background="#ff005764" android:layout_width="wrap_content" android:layout_height="wrap_content" android:layout_marginTop="6.0dip" android:foreground="@drawable/tw_recents_app_bg">

            <ImageView android:layout_gravity="center" android:id="@id/recents_item_background" android:layout_width="@dimen/tw_status_bar_recents_panel_bg_width" android:layout_height="@dimen/tw_status_bar_recents_panel_bg_height" />

        </FrameLayout>
〉STEP6:
Time to create ids.
▽Navigate to res/values and open strings.xml
Paste the below lines
#res/values폴더의 string.xml을 열어 아래 구문 두개를 맨 밑에 추가하세요.
  <string name="recents_item_background_shadow">recent</string>

    <string name="recents_item_background">no shadow</string>
▽Open ids.xml and paste the below lines
#이번엔 res/values폴더의 ids.xml을 열어 아래 구문을 맨 밑에 추가하세요.
     <item type="id" name="recents_item_background_shadow" />

    <item type="id" name="recents_item_background" />
▽Open dimens.xml and paste the below lines
#마지막으로 res/values폴더의 dimens.xml을 열어 아래 구문을 맨 밑에 추가하세요.
 <dimen name="tw_status_bar_recents_panel_bg_width">100.0dip</dimen>

    <dimen name="tw_status_bar_recents_panel_bg_height">120.0dip</dimen>
〉Download the .9.png from the attachment and paste it into drawable-hdpi
#첨부된 나인패치 이미지파일을 다운로드하여 각자 폰의 해상도에 맞는 dpi폴더에 넣으세요.(노트1_xhdpi)
#여기서 잠깐~!!!
게시글에 첨부된 나인패치 이미지를
tw_recents.bg.9.png 이렇게 나인패치 이름으로 하고 컴파일했을때 컴파일 오류가 발생합니다.
(이 현상은 사용자의 작업환경에 따라 컴파일이 될수도 있겠지만....)
그래서, 저는 임의로 나인패치 이미지가 아닌 일반적인 png파일을 만들어
tw_recents.bg.png 이렇게 이름을 해서 넣고 컴파일을 완료했습니다.참고하시기 바랍니다.^^
〉Recompile and done.
#끝.
DOWNLOAD THE BELOW
#이 이미지 투척 작업은 여러분 각자의 판단과 능력(?)에 맡기겠습니다.^^
tw_recents_bg.9.png
thanks to @RRGrr
[실제 노트1에 적용한 스크린샷]


